Telling a great story is super important, whether you’re sharing a favorite memory, showing off a product, or creating fun content for social media. That’s where the Ken Burns effect comes in. It’s a simple but amazing way to add motion to your photos or videos. With Visla’s new Ken Burns effect feature, you can make any picture or clip more exciting in just a few steps.
What is the Ken Burns Effect?
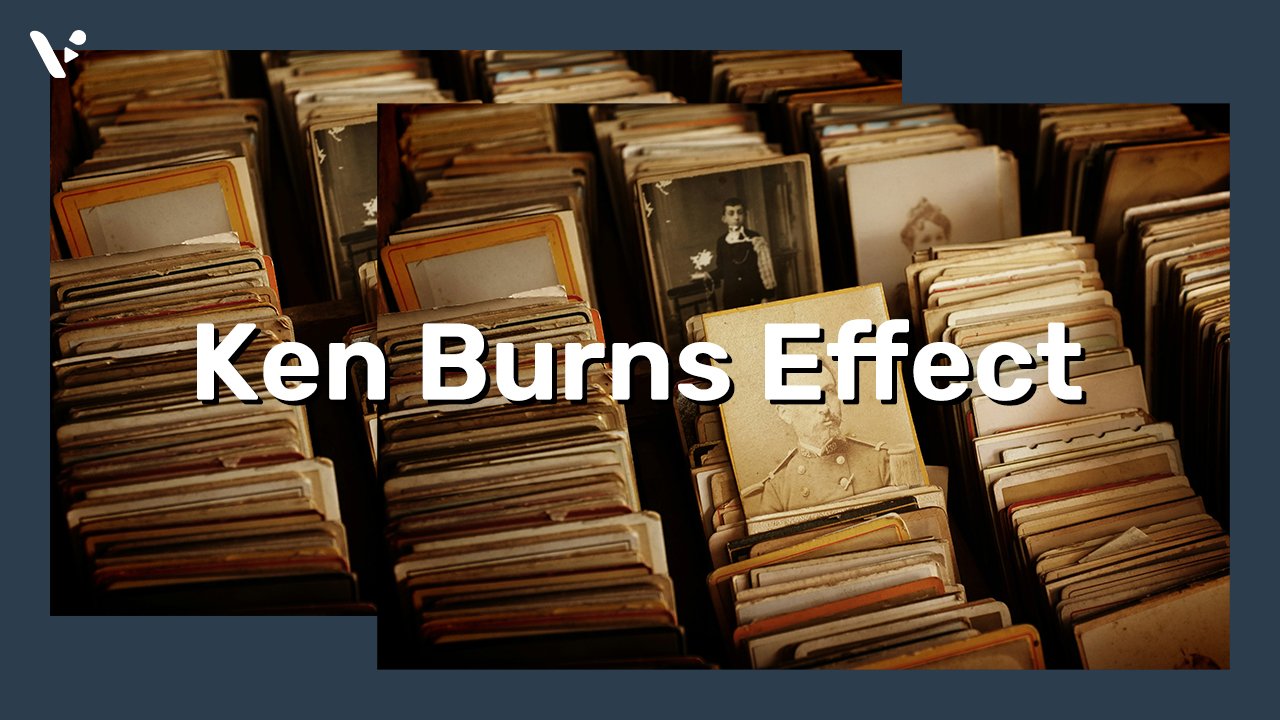
The Ken Burns effect is named after a famous filmmaker who used it to make old photos come alive in his documentaries. This effect adds motion to still images by zooming in, zooming out, or panning across them. Here are some examples:
- Zoom In: Slowly focus on a person’s face or an important detail.
- Pan Left or Right: Move across a beautiful landscape or a busy infographic.
- Zoom Out: Show the big picture by pulling back from a close-up.
This effect makes your pictures and videos feel more cinematic and grabs people’s attention. Whether you’re making a video for fun or work, it’s a great way to keep viewers interested.
Adding motion like this can also make it easier to guide people through your story. Instead of just looking at one thing, they follow the movement and focus on what matters most. This is why the Ken Burns effect is so popular—it’s simple but powerful.
How to use the Ken Burns effect in Visla
Adding the Ken Burns effect in Visla is easy. Just follow these steps:
1. Start a new project: Open Visla and start a new video project.


2. Pick a scene: Click on the scene in the timeline where you want to use the effect.
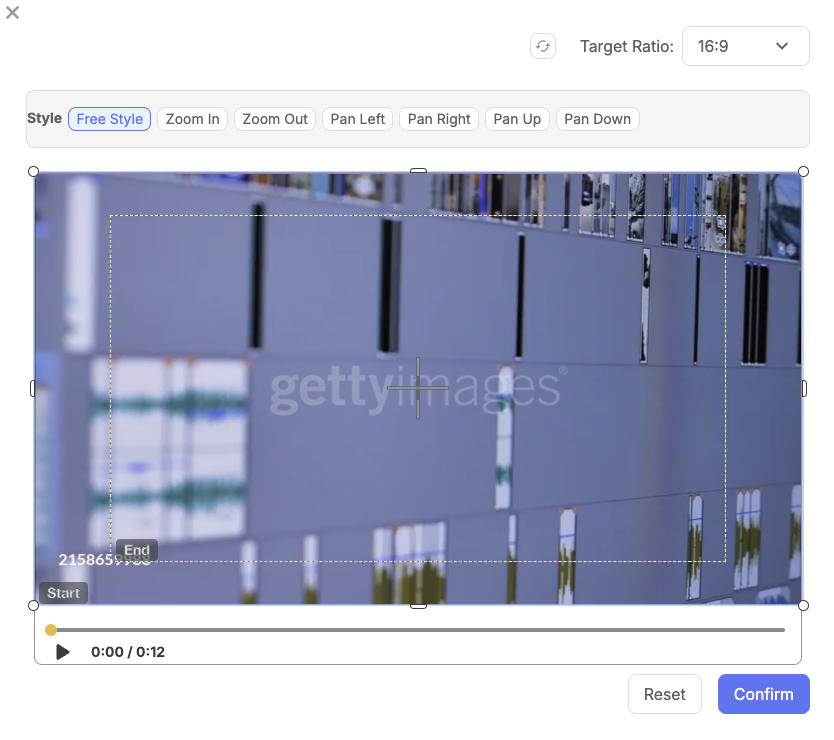
3. Click the Ken Burns button: Click the Ken Burns icon above the video preview. This brings up a new window with more options.


4. Choose a style: Decide how the motion should look. You can pick:
- Free Style: Move the start and end points anywhere you want. This is perfect for creative or custom effects.
- Zoom In or Out: Slowly zoom in or out. Use this for dramatic effects like focusing on a key detail or showing the bigger picture.
- Pan Left, Right, Up, or Down: Move across the image in any direction. This is great for maps, charts, or group photos.
5. Pick the right size: Choose the aspect ratio for your video:
- 9:16 for vertical videos (great for Instagram Stories and TikTok).
- 16:9 for widescreen videos (perfect for YouTube and presentations).
- 1:1 for square videos (ideal for Instagram posts).


6. Preview and save: Watch the preview to see how it looks. You can adjust the start and end points or change the style if needed. If you’re happy, click the blue “Confirm” button to save your changes.
Why use the Ken Burns effect?
- Show Emotion: Zooming in or panning across an image can highlight emotions or important details. This works great for personal videos like family albums. Imagine a wedding slideshow with a slow zoom into the happy couple’s smiling faces—it’s instantly more touching!
- Make Things Interesting: Still pictures can get boring fast. Adding movement makes them exciting to watch. Even a simple zoom or pan can turn a plain image into something engaging. This is especially useful for social media, where motion grabs attention.
- Tell a Better Story: Guiding where people look helps them follow your story more easily. A pan across a scene or a zoom into a key point makes it clear what you want them to focus on. When you’re creating videos for teaching or presentations, this can make all the difference.
- Look Professional: This effect gives your videos a polished, cinematic look that stands out. I’s a simple way to impress your audience.
Who can best use the Ken Burns effect
1. Marketing and Sales:
- Zoom in on a product’s key features to highlight what sets it apart. For example, emphasize the sleek design of a tech gadget or the vibrant colors of a clothing item.
- Pan across customer testimonials, lifestyle images, or charts that tell a compelling story about your brand. This works great for building trust and driving engagement in ads or sales presentations.
2. Training and Learning:
- Highlight critical parts of training materials like diagrams, workflows, or step-by-step processes. A zoom can show details, while a pan can guide learners across the information.
- Use a zoom-out effect to give learners a big-picture view of how individual tasks fit into larger goals or systems.
3. Customer Success and Support:
- Showcase step-by-step tutorials or how-to guides with clear visual emphasis on important details. For instance, pan across a product interface or zoom in on key buttons.
- Create engaging follow-up materials that keep clients informed and excited about your offerings.
4. HR and People Operations:
- Add movement to onboarding videos or training sessions to make them more dynamic and engaging. For example, zoom in on key points in a company values slide.
- Pan across employee testimonials or team photos to highlight company culture and boost internal communications.
5. Product Development:
- Present prototypes or designs with smooth pans and zooms to highlight critical features during stakeholder meetings.
- Use the effect in roadmap presentations to guide attention to important milestones or timelines.
6. Business Presentations:
- Pan across data visualizations, charts, or infographics to make complex information easier to understand. For example, show how different regions are performing in a sales report.
- Zoom in on key statistics or goals to emphasize their importance and make your point clear.
Why choose Visla?
Visla makes the Ken Burns effect easy and fun to use. Here’s why you should try it:
- Simple to Use: No special skills are needed. The easy interface makes it quick to learn. Even if it’s your first time editing, you’ll feel confident.
- Lots of Options: You can pick from different styles and sizes to fit your project perfectly. There’s something for every type of video.
- Free to Try: Unlike some tools, Visla lets you use this feature for free. You don’t have to spend money to create something amazing.
- Precise Control: Apply the effect to just one scene or use it in multiple spots. You’re in charge, so you can make each part of your video look exactly how you want.
FAQ
What is the Ken Burns effect, and how does it enhance videos?
The Ken Burns effect is a motion technique that adds panning and zooming to still images or videos, creating a cinematic and engaging experience. It brings static visuals to life, making them dynamic and helping to highlight key details, which is perfect for marketing, training, and storytelling.
How can business teams use the Ken Burns effect effectively?
Business teams can use the Ken Burns effect to enhance presentations, marketing materials, and training videos. For example, marketing teams can zoom in on product details to emphasize features, while HR teams can make onboarding videos more engaging by panning across slides or team photos. The effect also works great for sales pitches, product demos, and visual storytelling.
Why is Visla the best tool for applying the Ken Burns effect?
Visla makes the Ken Burns effect simple to use with a user-friendly interface, customizable styles, and free access to essential features. Whether you’re a marketer, trainer, or content creator, Visla lets you easily pan, zoom, and choose aspect ratios to match your needs. It’s perfect for creating professional-quality videos with minimal effort.

